I’ve been posting a few notes with my carvings, and I’ve received questions from you about the materials I use and how my process looks.
So, in this week’s newsletter, I thought I’d share a little more about what I do and how I do it.
Besides being a lot of fun, one thing I love about this technique is that it doesn’t require a lot of space or mess. I can easily grab my materials and bring them with me if I’m heading somewhere, and it only takes a moment to get started.
Before trying rubber carving I associated block printing with protective clothing, printing presses and a whole lot of cleanup. Maybe that’s just me.
I don’t mind mess, but I really like being able to get started quickly. Especially when my kids were younger and my art making time was quite limited.
It lowers the creative threshold. If I can lower that barrier, I definitely do.
Materials I Use
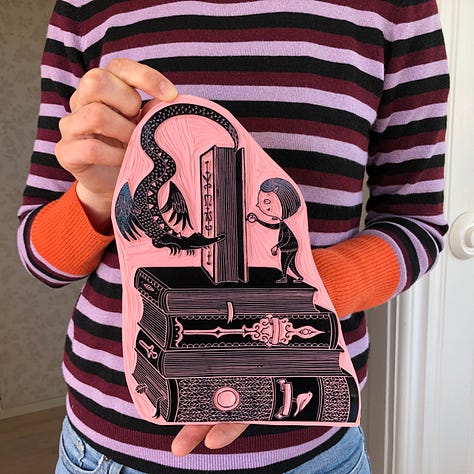
The material I use for my carvings is rubber. The blocks are called “rubber carving blocks” and my favorite brand is Speedy-Carve by Speedball.
I sometimes use sandwich colored blocks too, though they aren’t from a specific brand. I love how they look, but they don’t last as well over time compared to Speedy-Carve. That said, the different colors are helpful — you can clearly see where you’ve carved and how deep. And the actual stamp often looks prettier.😊
Another great thing about Speedy-Carve is that the blocks come in different sizes.
If you don’t have access to blocks, you can try carving a small stamp from an eraser — that’s how I made my very first stamp: a tiny little tree.
I don’t have a paid collaboration with any of the brands I mention here, but I have collaborated with Speedball in the past. I once did a takeover of their Instagram and they’ve kindly sent me materials to try — but that happened after I was already completely hooked on their blocks which they had noticed.😊 I never recommend a brand unless I truly love their products and use them in my own work.
I’ve tried out several carving tools but stopped searching after buying a set of linocut tools by Pfeil. Rubber is such a soft material that I haven’t felt the need to sharpen or replace them. They’re expensive — but totally worth it for me. I’ve had the same set since 2015! So that’s the ones you see in all of my videos and pictures.
Other materials I use are:
drawing paper
a 2B pencil
transfer paper (to transfer my sketch to the block)
a bone folder (to rub the transfer paper)
and a scalpel
For printing, I use inkpads by Tsukineko. There are probably other great brands out there too — so if you have any favorites, I’d love to hear about them! If I remember correctly, Tsukeniko was the first brand I tried and I was happy with the result, so I stopped looking.
Applying ink to a freshly carved stamp is my favorite part of the whole process. It’s the moment of truth when I get to see if it turned out the way I hoped.
I’ve noticed there are new colors in the Tsukineko range that I haven’t tried yet. So I’m definitely feeling the need to buy them and make a new color chart. A great excuse to buy more art supplies, right?
What to Carve?
I have a few favorite subjects that I enjoy carving more than others. You may have seen some of my birds pop up in my posts. I especially love carving things from nature that have repetitive patterns, like feathers, leaves, or fish scales.
My process often starts with me thinking of a specific thing I want to create.
I don’t usually sit down to sketch and see what comes out — the subject has typically already taken form in my mind. When it comes to birds, I like flipping through one of my bird books until I find one I’d enjoy carving. Then I look for reference images to use for inspiration.
Sometimes, I’ve already painted something that I realize would work well as a carving subject. I really enjoy creating different versions of the same motif and seeing how the outcomes vary.


Here is a process video of me carving. And you will be able to see the different steps I have talked about above:
I use a baren in the video when applying pressure to the stamp when printing. It’s not an essential tool if you are just starting out, but I find it very useful.
How I Store My Carvings
I’ve shown you my beloved cabinet before — but that’s where I store all my stamps.
When I first started my online shop, I took commissions and spent way too long trying to find the right stamps each time. Now I keep a list noting which drawer each stamp is stored in — it has literally saved me hours, probably days of my life.
Besides keeping things organized, I always clean my stamps with lukewarm water and pH-neutral soap, and let them dry before wrapping them in cling film or plastic bags.
What do I do with all of the prints?
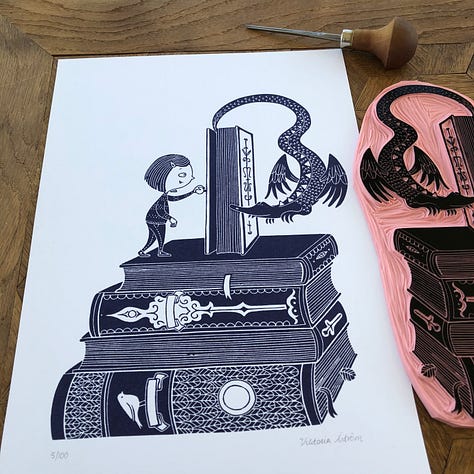
I do sell some of my prints in my Etsy shop, and I also have my art for sale at Spinneriet in Gothenburg, where I work at times.
I’d love to hear from you
Have you tried carving — or are you curious to begin? Please leave a comment and let me know! I always love hearing about what you’re working on, or what subjects you’d be excited to carve.
I’m also planning to offer mentoring sessions and online classes on carving (and other creative topics) early next year. Perhaps even sooner. If you’re interested, I’d be so happy to hear from you — and know what kind of support or guidance you’d find most useful.
Thanks for reading — and for being part of this journey.
Until next time: happy carving!
💛
All the best,
A few links:
Tsukeniko inks (if you are based in Sweden)
Pfeil tools (if you are based in Sweden)


Hi Victoria! I really enjoyed learning more about your process. I’ve recently started lino printing and I became addicted to it very quickly. Until now I’ve been using essdee cutters but am going to order some of the Pfeil ones. Which set did you buy? I see they come in A, B, C. Otherwise I’ll pick 3, individually, which I think would be most useful for now.
I came just to have a little nosey and now I have fallen in love with your work! Very inspirational.